
In this help article, we will show you how you can trigger a Zapier workflow upon completion of a WebAutomation extractor session in oorder to upload its results to a Google spreadsheet.
Have an WebAutomation.io account
Have a Zapier account
Create a Google spreadsheet where the scraping results will be uploaded to
Firstly we need to create an extractor and run a session to scrape the data. See this article on detailed instructions on how to do this . Once you have chosen a Pre-Defined extractor and activated it to create a new session you simply click "Run Now". Once completed you will see the data results in the in the Data tab.
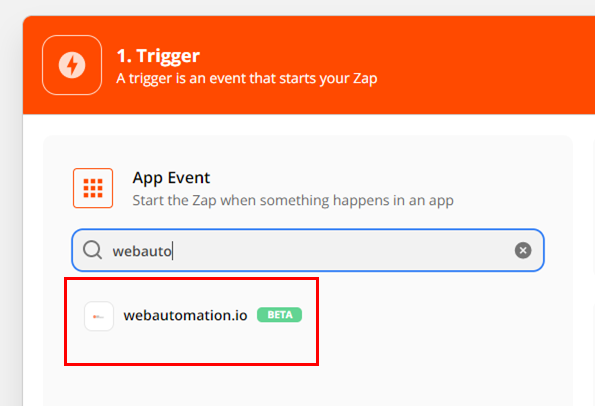
Once you have your task ready, go to Zapier, log in and click on Create a Zap! button. Since we want to trigger the workflow when the task finishes, let's choose Webautomation.io as the trigger app.
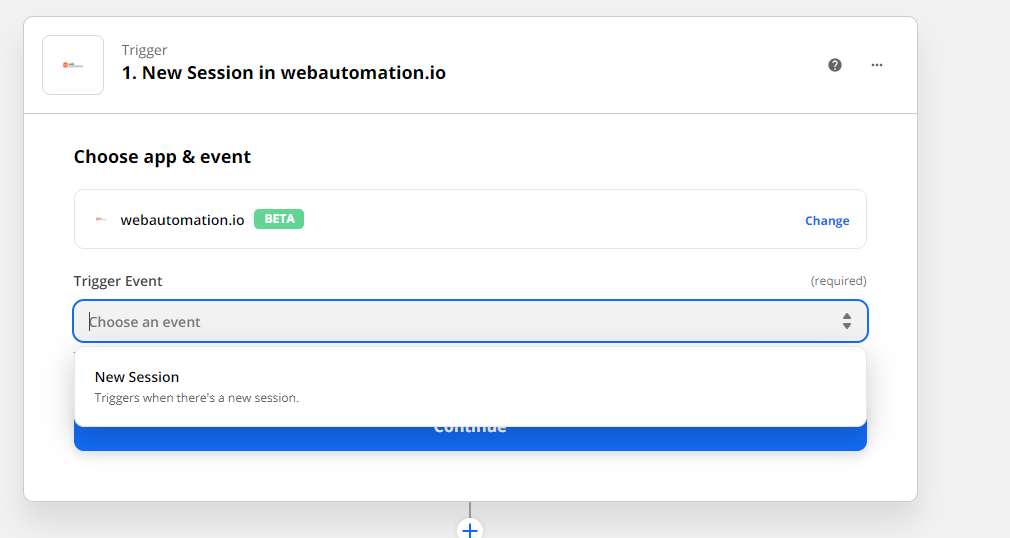
Then select the new session trigger from the list.
Now you'll need to connect your WebAutomation account with Zapier. For that you'll need your username (email address) and password
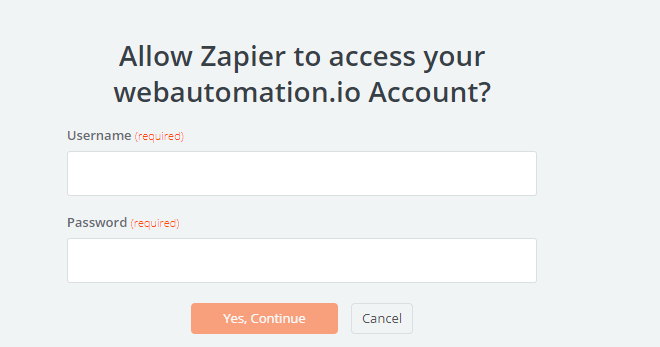
Simply input the username and password to Zapier.
After a successful connection of your Webautomation.io account, you can choose the task that you created in the previous steps from the dropdown list . Every time this task finishes, the Zap will be triggered.
On the next page, you can see sample runs for the selected task. If you don't see any runs, you'll need to go to Webautomation Data, open your task and run it. After the task is finished, you should see the last run on Zapier, where you can pick it as a sample.
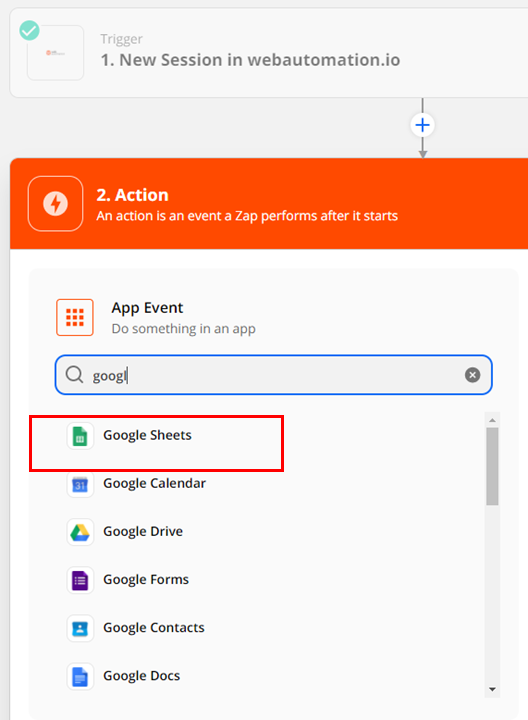
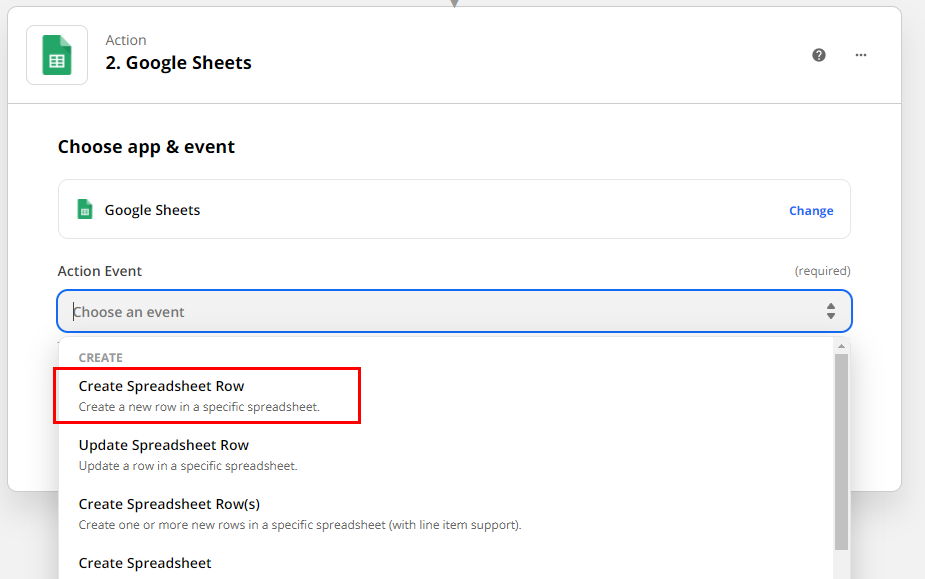
As the trigger has now been setup, you can configure an action that will be performed when the session finishes. Let's click on Add Step and choose Google Sheets from the list of Zapier apps available.
Now, choose the Create Spreadsheet Row(s) action, which is available as an action event
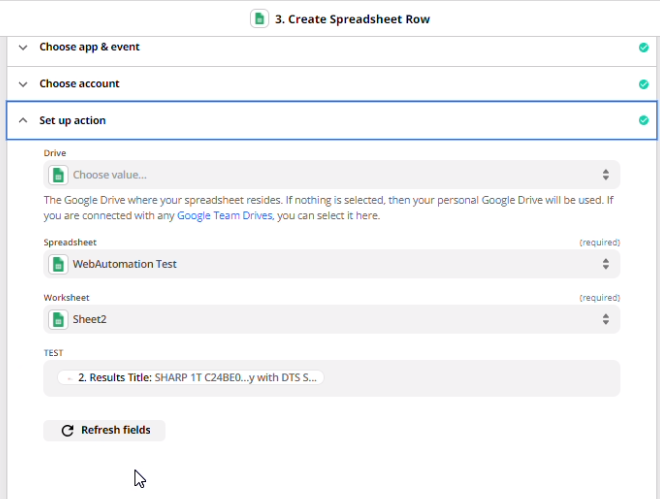
Next, you will need to connect your Google Account and grant write access for Zapier. Then we can configure the creating of sheet rows. First, let's choose Google Drive and the sheet where you want to save the data. Then we select an attribute from session results for each row in a sheet.
Then click the Continue button and on the next page click Send test to Google Sheets to test the workflow.
The Zap creates a test run of the action and we can see the data uploaded to the spreadsheet.
If the results in sheet look correct, you can simply name your new Zap and switch it on.
Once the Zap is on, it will be started every time an extractor session on Webautomation completes . Note that the Zap automatically created a webhook for the task.
Happy integrating with Zapier!
You should login to leave comments.